 |
|
||
|
There are many sources for the problems seen in wireless networks. They are all due to two reasons. First is the unbounded nature of a wireless network, which makes it subject to interference in all its forms. The second is the nature of the technology itself. The standards on which the current technology is based produce several interesting problems.
The connectors and cables used for CAN links are not at all like those used in LANs. Besides the correct connector type, the cable itself must be the correct type. In the case of coax cable there are many different types all with different characteristics. Cables are used to connect the antenna to the radio when they cannot be collocated. This is seen sometimes in wireless LANs and often in wireless CANs. Cisco also uses a coax cable to provide electrical power to some of the bridge units.
In general, Cisco radios use either the RP-TNC connector, which is a reverse polarity TNC or an N connector for the antenna connection, when the antenna is not internal. The RP-TNC looks like this.
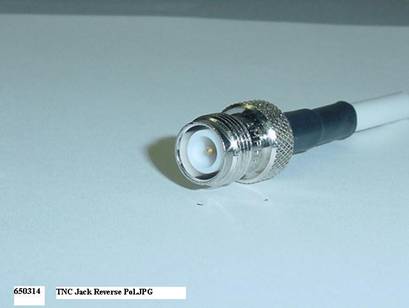
Figure 1. Reverse Polarity TNC Jack
Photo Courtesy of Amphenol
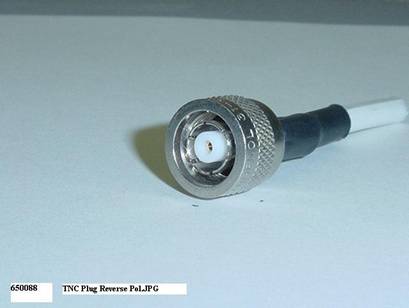
Figure 2. Reverse Polarity TNC Plug
Photo Courtesy of Amphenol
If not, the RP-TNC then the radio uses the N connector for the antenna connection. The N connector looks like this.
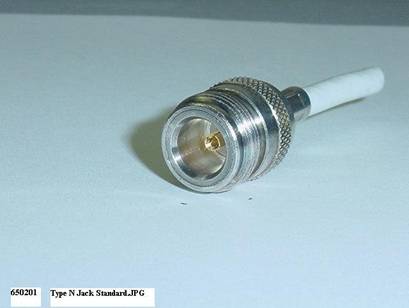
Figure 3. N Jack
Photo Courtesy of Amphenol
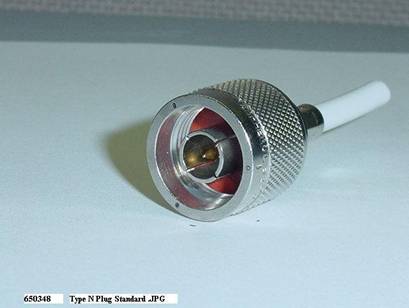
Figure 4. N Plug
Photo Courtesy of Amphenol
The F connector is used on the coax power cables.
Figure 5. F Connector on a cable
Photo Courtesy of Amphenol
The type of cable used is coax, such as this.
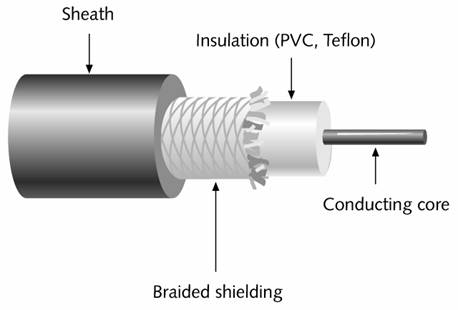
Figure 6.
Cisco says this type of coax cable is RG-213 with 50-ohm impedance. Be sure all components are rated the same impedance.
Cable runs from the radio to the antenna must be kept as short as possible. Signal loss in cable is high. Even the expensive low-loss cables loose significant signal strength for every foot of cable run. Here are the values quoted by Cisco for their standard cables.
| AIR-CAB020LL-R | AIR-CAB050LL-R | AIR-CAB0100LL-R | AIR-CAB0150LL-R | |
| Length | 20 ft (6 m) | 50 ft (15 m) | 100 ft (30 m) | 150 ft (46 m) |
| Loss | 1.3 dB | 3.4 dB | 4.4 dB | 6.6 dB |
These cables are basically the same as the more common ones from Times Microwave and Andrew. The Times Microwave LMR cable and the Andrews Heliax line are widely used to connect radios to antennas. Here are the loss figures quoted by Cisco for these cables.
| Cable | 2.5 GHz Loss (dB) per 100 ft | 5.8 GHz Loss (dB) per 100 ft |
| LMR-400 | 6.8 | 10.8 |
| LMR-600 | 4.45 | 7.25 |
| Heliax | 5.7 | 10.5 |
Notice that the loss is higher as the frequency goes higher.
LMR cable looks like this.
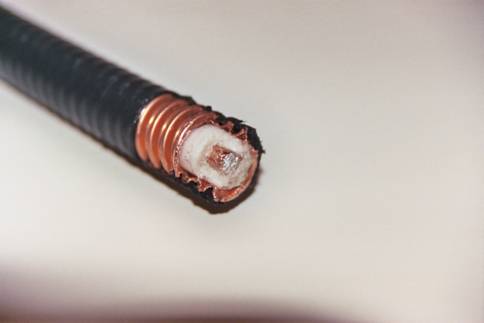
Figure 7.
Heliax looks like this.

Figure 8.
Photo Courtesy of Andrew
Bridge power cables are RG6 or RG59 75-ohm coax cable. This is a common cable. There is a 100-foot limit to this cable. Running it farther may work, but the unit will not receive sufficient power, which will lead to premature failure of the radio.
The point of all of this discussion of connectors and cabling in a tutorial on RF troubleshooting is that the coverage area will be less -- sometimes much less -- than expected if the wrong type of cable or connector is used. For example, Figure 9 is a graphic to illustrate this. It shows that separating the antenna from the radio creates a smaller coverage area due to the loss of signal strength in the cable. This same thing will happen if the wrong type of cable is used or if water gets in the cable.
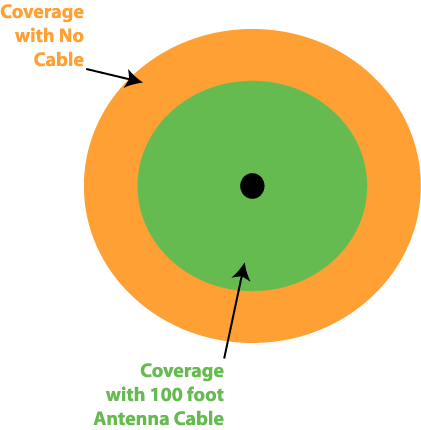
Figure 9.
Attaching connectors to low loss cable requires special tools and some training. The tools from Times Microwave cost several hundred dollars. Failure to properly install the connector will lead to unexpected signal loss. The best method is to use preassembled cables with the connectors already installed.
Once the cable is assembled, if it goes outside, some method of sealing the connection where the cable attaches to the connector and then the connector to the radio must be used. As stated above, moisture is very, very bad for connections carrying RF signals. You must keep moisture out of the connections. If water gets in, forget getting it out, just replace the part. To keep it out in the first place, seal connections using one of the methods discussed below. Recheck these connections on a regular basis. Unexpected signal loss over time is often due to water infiltration.
No one can agree on the best way to keep moisture out. Everyone does agree that it must be done. Listed next are some of the methods that have been suggested. No one method is any better than any other. Try them and use the one that works for you. The basic method is to wrap the connection with a layer of 3M Scotch 33+ tape. Then a layer of 3M Scotch 2210 vinyl mastic tape. The final layer is another one of 3M Scotch 33+. Each layer is laid on from bottom to top to produce a shingling effect. Also be sure the tape lays down nice and flat with no bubbles or bulges. The first layer of electrical tape adds a protective layer between the connector and the mastic, which is sticky. The next layer of the vinyl tape covers the mastic and keeps the gooey stuff from sticking to something it should not, as well as keeping out the water. The mastic is basically a thick sticky tape. It is sticky on one side. The stick is covered with a peel off cover. This substance is about 1/8" thick. The three layer combination also allows the tape to be removed by slicing down to the bottom layer and peeling the tape off like you peel a banana. In some places, Cisco recommends 3M Scotch 88 tape. 3M says this tape:
...offers better mechanical/abrasion resistance, and is thicker for quicker build-up. For professional use, this tape combines the flexibility of a PVC backing with excellent electrical insulating properties to provide primary electrical insulation for splices up to 600V and protective jacketing. UL Listed and CSA Certified. Excellent resistance to UV rays, abrasion, moisture, copper corrosion, alkalis and acids. Excellent all-weather performance in cold to 0°F (-18°C) or hot to 220°F (105°C).
3M says the 33+ tape is:
...highly conformable and super stretchy in all weather applications. This tape provides flexibility and easy handling for all around performance. It combines PVC backing with excellent electrical insulating properties to provide primary electrical insulation for splices up to 600V and protective jacketing. UL Listed and CSA Certified. Excellent resistance to UV rays, abrasion, moisture, copper corrosion, alkalis and acids, and is flame-retardant. Excellent all-weather performance in cold to 0°F (-18°C) and is designed to perform in a continuous temperature environment up to 220°F (105°C).
Use either one.
In addition to this basic method, some first spray the inside of the connector with non-dielectric Bull Frog protectant. Others apply a liberal (about 3 mm) coat of Scotch Coat liquid, not spray to this top. Others say forget the sprays and liquids, as they just make a mess.
Another idea is Coax-Seal. This is recommended by Cisco in several places. It is a form of the vinyl mastic. This is applied as a single layer. An example of how this is applied is shown on the Coax-Seal web site.
Always use a drip loop, such as shown in Figure 10, to keep the water from riding along the cable to the connector.
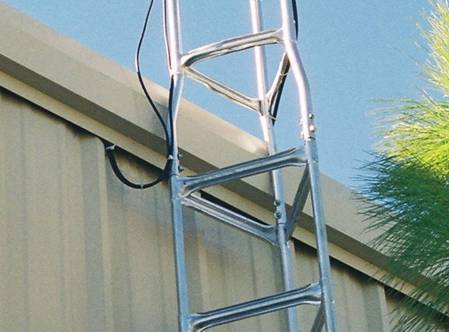
Figure 10.
This is quite a lot of information on water infiltration protection, but this is an important topic for preventing trouble. A link will work for a while, but gradually fail if these protective measures are not applied.
Water in another form can also cause problems for outdoor point-to-point links. When water freezes into ice on an antenna, the result can be a dramatic change in the antenna's radiation pattern according to Til-Tek. The higher the frequency, the worse is the problem. Til-Tek's research has found ice buildup to be a problem because the dipole elements of an antenna radiate radio waves into free space. The impedance of free space is 377 ohms. If the air surrounding the elements is replaced by ice, which has lower impedance, the impedance match and radiation pattern of the antenna will change. Ice has the same effect as if the directors were lengthened. As the electrical length of the directors becomes greater than one-half wavelength, they stop being directors and start acting like reflectors. To prevent this problem, antenna elements are usually encased in a plastic protective housing or radome.
For example, for a 10-element Yagi antenna at 502 MHz, the normal radiation pattern looks like this.
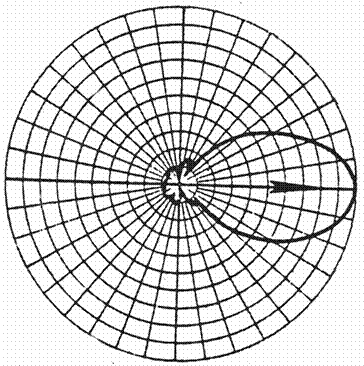
Figure 11.
Graphic from Til-Tek
With 0.20 inches of ice, the same antenna has a radiation pattern like this.
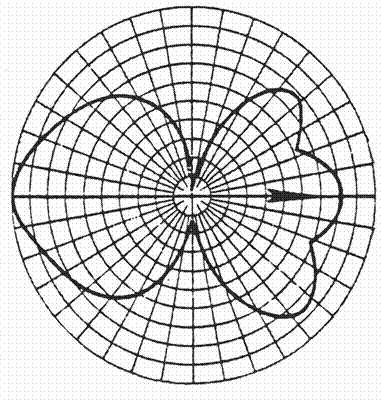
Figure 12.
Graphic from Til-Tek
Here's an example of ice buildup on an outside antenna.
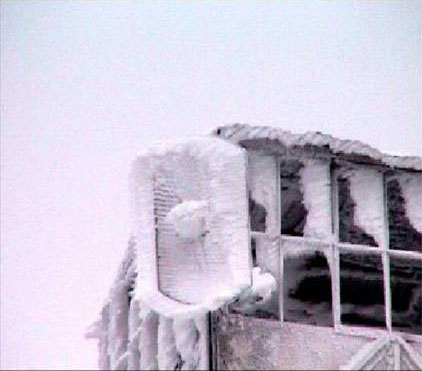
Figure 13.
Photo Courtesy of Alvarion
[IE-RFT-WP1-F02]
[2005-06-13-01]
|